Free guides / Automotive
How to Replace a Cabin Air Filter
The cabin air filter cleans the air coming through your vents. A clogged one causes weak airflow, foggy windows and musty smells. Most are behind the glove box.
Safety first
- Turn the car and fan off before removing the filter.
- Wear a dust mask if the old filter is moldy.
Tools
- Flashlight
- Screwdriver, only on some models
- Vacuum (optional)
Parts
- Cabin air filter for your year, make and model (activated carbon helps with odors)
Step by step
Empty the glove box
Take everything out so it can drop down fully.
Drop the glove box
Unhook the damper arm on the side and squeeze the sides inward (or remove the stop screws) so the glove box swings down past its stops.
Remove the old filter
Unclip the filter cover and slide the old filter straight out. Note the airflow arrow direction.
Install the new filter
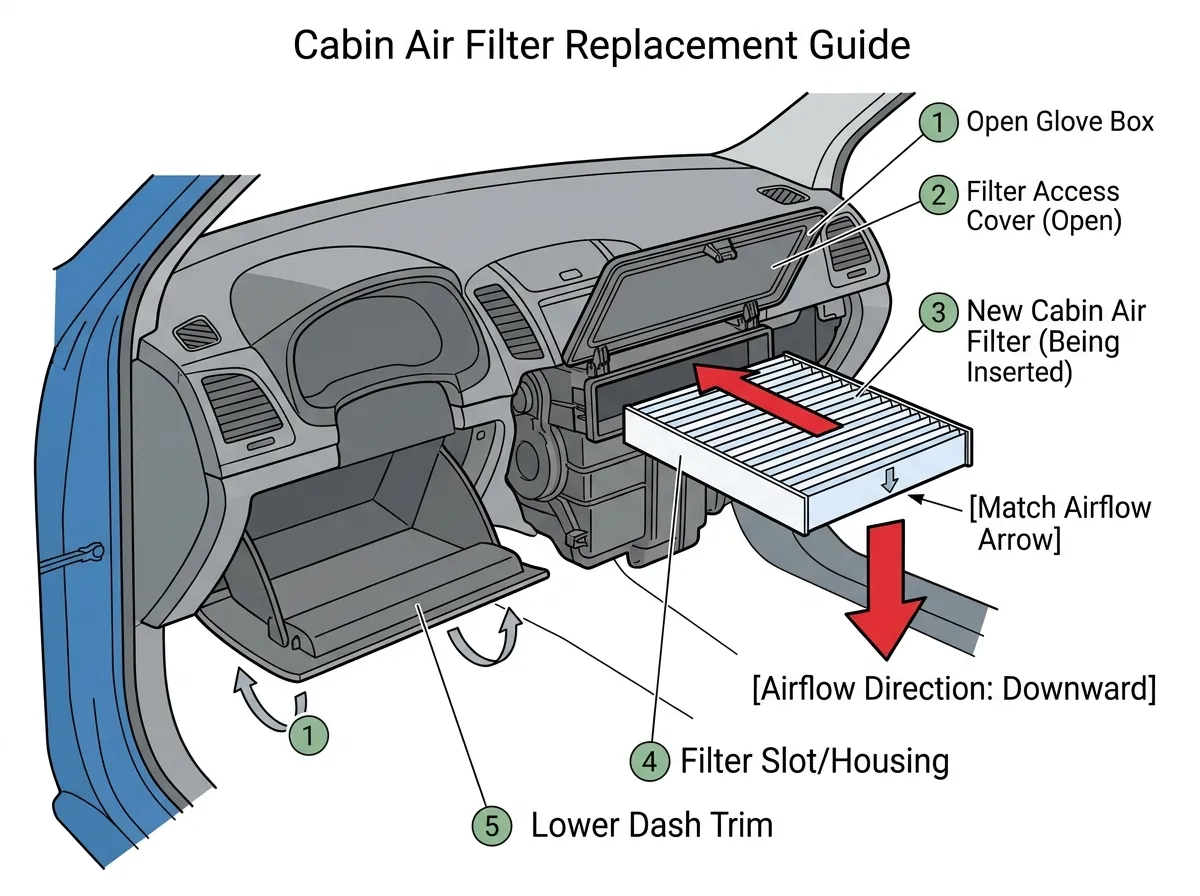
Labeled diagram: Install the new filter. Tap to enlarge. Vacuum any leaves from the slot and slide the new filter in with the airflow arrow pointing the same way as the old one (usually down).
Close up and test
Refit the cover, swing the glove box back up and reattach the damper. Run the fan on high to check airflow.
When to call a pro
Have a shop look if the smell continues after a new filter; the evaporator or drain may need cleaning.
Not sure it's the same problem?
Snap a photo in DIYFixAI to identify your exact model and part, then get a step-by-step plan, the exact parts and the best videos.
Scan my repair →